A Police Clearance is a certificate issued by the Local Police Department in the Philippines upon the individual’s request. The main purpose of the clearance is to show if the person requesting it has any criminal cases filed against him/her in the locality.
Local citizens get a Police Clearance for some important purposes or requirements such as for Local Employment, Passport Application, Business Permit among several others. It is also the best alternative if you don’t have any valid ID that can be used in many legal transactions and requirements.
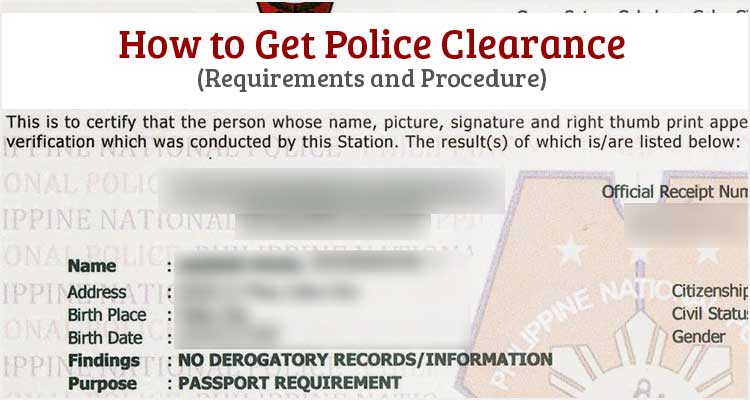
Unlike NBI Clearance wherein the scope is to check any criminal cases of a person in the entire Philippines, a Police Clearance’s scope is limited to the city or province where the individual is currently living. The validity of a Police Clearance is 1 year or 6 months.
Police Clearance Requirements
- Cedula or Community Tax Certificate (original and photocopy)
- Barangay Clearance (original and photocopy)
- 2 pieces of 2×2 ID Picture
- Cash for Police Clearance Fee/s
- Black Ballpen
In other cities, a valid ID containing your current address is enough that there’s no need to bring a Cedula and Barangay Clearance. However, it is safe to assume that you need to bring the Cedula and Barangay Clearance since these are the official requirements in getting a Police Clearance.
In addition, you need to bring a 2×2 ID picture to be attached in your police clearance. The local police station in your area might have a camera to take ID picture but then again, it is safe to assume just to bring your own.
The payment for Police Clearance varies depending on your area and purpose of getting it. The estimate and usual range is ₱100 – ₱200.
How to Get Police Clearance
- Go to the Local Police Station in your city/town and bring the requirements listed above.
- Politely approach the Duty Desk Officer that you want to request for a Police Clearance then you’ll be given a Police Clearance Request Form.
- Accomplish the request form, double check the data you have written then pass it to the officer in charge.
- You will then be asked to proceed to the Local Treasurer’s Office to pay for the Police Clearance Fee.
- With the official receipt on hand, you will then be guided to place your thumb mark and signature on the clearance form.
- Wait for the official call of your name and claim your fresh Police Clearance.
Make sure you have read the requirements and procedures carefully with an open mind and a general perspective on How to Get Police Clearance. If you have any questions or additional useful information, share it in the comment section.


